Sepia tones.. For this photo ,I took the image to photoshop and I cropped it a bit so that my dogs head was off center I then went to Image then adjustments then to Hue/saturation and took the saturation button all the way until the image was in black and white,I then clicked ok and then I went back to image then adjustments then colour balance,and took the red button to 46 and the yellow button to 36. You can play around with this untill you are happy with the end result,very easy ,quick and effective.
Monday, January 4, 2010
So you think Photoshop is just to hard,well its not,it just takes a little time and practise,and there are so many tutorials to help you get going,I have added this basic photoshop tutorials for you and it will show you all the tools in your photoshop,check it out and get going,I will add more photoshop tutorials in the coming weeks..
The photo above is an example of a lazy photographer but it can be just what you need to get that pic done and uploaded,you can get good pics with the very basics but this can be time consuming and frustrating,you will need patience, so if you don't have all the bells and whistles don't fret,you can do quite well with out them until you can up grade.
Ive been doing some photo work with my latest dolls,and what I would like to share today is the need for a space just for photography,you definitely need a space just for doing your photo shoots and props if at all possible,you will find that if you have your space made so that it can be left unpacked then you will work more often,also a space provided just for your props is a very handy thing,it takes a lot of messing about out of the equation. I am making a designated space for my photo cube,back drops,lights and tripod in my studio,and a space for stop motion animation as well as for props,I find that if I dont do this then I will get lazy and not work as often as I should and not work as well as I should,so organization is a must..well for me anyway,I will show a photo of my space once it is all set up next week end.
About props...you can use any thing for props..from paper to wood,over the next few months I will be showing how to make props for different photo shoots,so stayed tuned for that.
The following vids will give you an idea of how to set up a home based photo studio...
Keep clicking and Ill add more next week.
Saturday, December 19, 2009
This is a portrait I took of my nephew having his hair cut,I tweaked it in photoshop of course,I am pretty happy with this image.
Play around with your camera,take lots of shots of people doing every day things,you can end up with some great photos and memories,just keep clicking..
For some good tips on taking portrait photos check out this video...
Wednesday, September 2, 2009
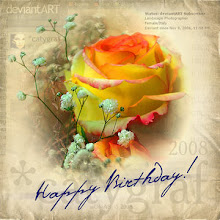
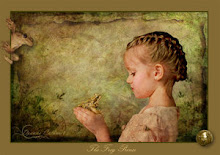
This image is done using a silk flower,some old jewelery and scrapping paper,it was edited in photoshop and is now a beautiful image ready to be sold.
For some tips on table top photography check out the video below.
If you wander around your home town long enough you will soon find things to shoot,I took these one summer afternoon a couple of streets away from my home,I then took it to photoshop for an edit and added a very very brief tale of the shoes and ended up with a story image. For this image I used some layers,brushes and gradients,it was simple and easy,I will do some tutorials in the near future to give you an idea of what you can so with a basic boring image. Click pic to enlarge.
This was taken using the kitchen table and some pretty props,then edited in photoshop..